
How to Fix Uneven Bathroom Subfloor Safely
A bathroom floor can look perfectly acceptable until new tile starts cracking, luxury vinyl develops soft spots, or a vanity rocks against the wall. To fix uneven bathroom subfloor problems correctly, the visible flooring has to come out and the real cause has to be addressed below it. Covering the issue with thicker underlayment or extra mortar may hide a minor dip, but it will not correct moisture damage, framing movement, or a weakened wood panel.
Bathrooms demand a higher standard of floor preparation because they combine moisture, heavy fixtures, narrow transitions, and rigid finishes. A level, flat, solid subfloor protects the investment in tile, vinyl, waterproofing, and labor. The right repair depends on what is making the floor uneven in the first place.
Find Out Why the Bathroom Subfloor Is Uneven
Not every uneven floor has the same repair. A floor that slopes slightly from one side of the room to another may be structurally sound, while a localized low spot near the toilet can signal a leak and rotted plywood. The distinction matters.
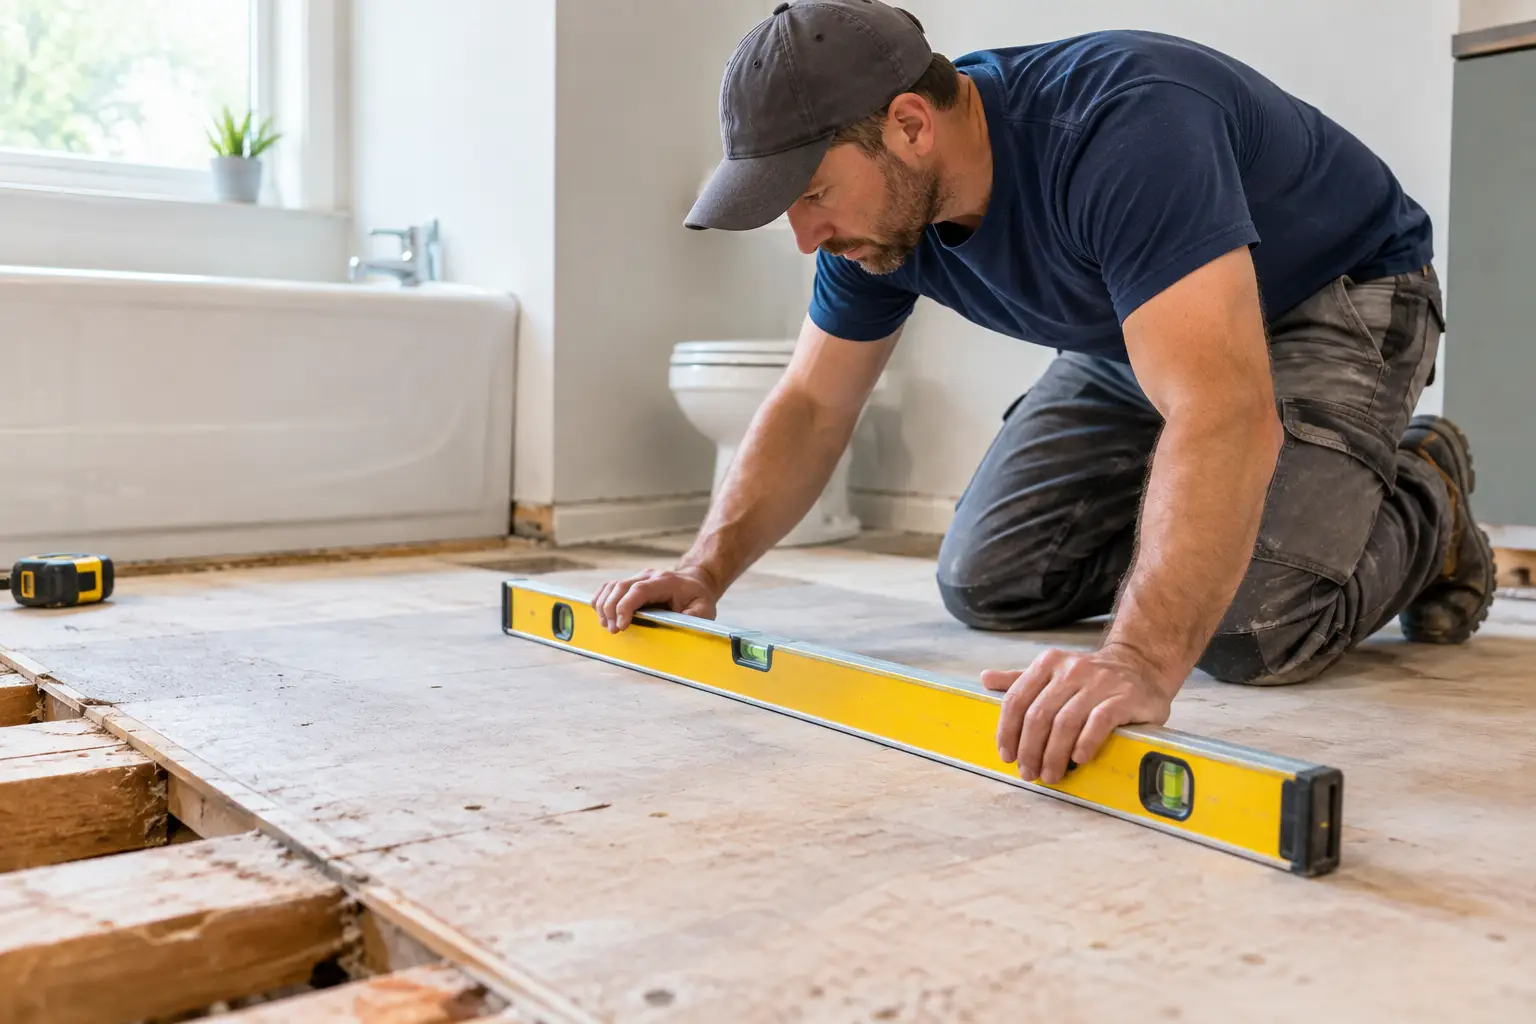
Start by removing loose floor coverings and checking the surface with a long straightedge or level. Move it across the room in several directions. Mark high points, low areas, soft sections, and seams that rise above surrounding panels. For tile installations, flatness is especially critical. Large-format tile is less forgiving than smaller tile, and even small variations can create lippage, cracked grout, or poor mortar coverage.
Pay attention to warning signs around the toilet, tub, shower, and vanity. Staining, musty odors, darkened wood, loose fasteners, or a floor that flexes underfoot point to moisture-related deterioration rather than a simple leveling issue.
The most common causes include:
- Water damage from toilet seals, supply lines, shower leaks, or failed waterproofing
- Plywood or OSB panels that are too thin, poorly fastened, or installed with uneven seams
- Floor joists that have sagged, been notched improperly, or shifted over time
- Old patching materials, multiple flooring layers, or leftover adhesive creating high spots
- A transition between rooms where the bathroom floor was built up or altered during a previous renovation
A professional inspection is the smart move if the floor feels spongy, the uneven area keeps growing, or there are signs of active water damage. Leveling compound cannot restore structural strength to compromised framing or rotten wood.
When to Repair, Replace, or Level the Subfloor
The correct solution usually falls into one of three categories: repair a localized damaged section, replace the subfloor, or flatten a sound subfloor before new flooring goes in.
Repair localized water damage
A small damaged area can often be removed and patched when the surrounding subfloor is dry, solid, and properly supported. This is common around a toilet flange after a leaking wax ring has gone unnoticed. The damaged material should be cut back to sound wood, with the edges supported by blocking or framing before a matching-thickness patch is installed.
The source of water must be repaired first. Installing new plywood over damp framing traps the problem where it can continue to spread. In a bathroom remodel, this is also the time to inspect the toilet flange height, supply connections, drain penetrations, and shower perimeter.
Replace the subfloor when damage is widespread
Full replacement is the better value when large sections are swollen, delaminated, soft, or contaminated by persistent leaks. It may also be necessary when the existing panels are too thin for the planned finish or when seams do not land on joists.
Replacement creates a clean opportunity to correct hidden problems beneath the floor. Damaged joists, inadequate blocking, loose pipes, and poorly routed wiring are much easier to address before new underlayment, waterproofing, and finish flooring are installed.
Flatten a solid but uneven surface
If the subfloor is structurally sound but has shallow dips or minor high spots, surface preparation can bring it within the tolerance required for the new flooring. High spots may be carefully sanded or planed. Low areas can be filled with a floor patch or a self-leveling underlayment rated for the specific substrate and flooring system.
This is where product selection and preparation make a major difference. Self-leveling materials are not a shortcut for every problem. They require a clean, stable surface, correct primer, sealed gaps, and proper depth. Without those steps, material can leak through openings, debond, or crack later.
How to Fix Uneven Bathroom Subfloor Before New Flooring
The repair sequence should protect both the structure and the final finish. Rushing through demolition or skipping surface preparation can create expensive callbacks after the tile or vinyl has already been installed.
First, remove the existing flooring, underlayment, fasteners, adhesive, and failed patch material. For a complete bathroom floor project, fixtures may need to be disconnected and removed to expose the full surface. Leaving old material under a vanity or around a toilet often creates inconsistent height and makes future repairs harder.
Next, clean the exposed subfloor and inspect every panel seam. Drive loose fasteners, replace stripped screws, and add screws where panels move against joists. Squeaks are not always a structural failure, but movement is a problem beneath tile and can lead to cracked grout or loose finishes.
Then measure the floor again. A reliable straightedge reveals whether the issue is a shallow surface variation or a structural slope. Use the installation requirements for the selected material as the standard. Ceramic and marble tile demand a very flat substrate, while some vinyl products can tolerate slightly more variation. Neither performs well over soft areas, open seams, or abrupt ridges.
For shallow depressions, apply an approved patching compound in thin, controlled lifts. For broader low areas, a self-leveling underlayment may be appropriate after priming and sealing the room perimeter, plumbing openings, and subfloor gaps. The goal is a flat, continuous surface, not simply pouring material until it looks level.
If the floor is sloping because joists are sagging or framing is uneven, the repair may require sistering joists, adding blocking, or correcting the framing from below. This work should be evaluated carefully, especially in older homes, condominiums, and properties with plumbing or electrical lines running through the joist bays.
Do Not Build a New Floor Over a Bad Base
A common mistake is installing cement board, new plywood, or peel-and-stick flooring directly over an uneven or damaged base. Cement board is not designed to level a floor or strengthen a failing subfloor. It provides a compatible surface for tile when installed over a properly prepared floor.
Adding another layer of plywood can be effective in some assemblies, particularly when a floor needs greater stiffness for tile. However, it raises the finished floor height. That can affect door clearance, transitions to adjacent rooms, toilet flange height, vanity placement, and accessibility. In a bathroom, those details are not cosmetic. They affect function and water protection.
Marble and other natural stone finishes require even more attention because they generally need a stiffer floor system than ceramic tile. A floor may feel solid when walked on yet still flex enough to damage stone or grout over time. This is one situation where a professional assessment is worth the cost before material is ordered.
Prepare for Tile, Vinyl, or Marble the Right Way
The final preparation depends on the finish selected. Tile typically requires an appropriate tile underlayment or uncoupling system, combined with a waterproofing plan in wet areas. Vinyl needs a smooth, clean surface because small imperfections can telegraph through the material. Marble calls for exceptional flatness, stiffness, and installation precision.
Bathroom waterproofing should also be treated as part of the floor system, not an optional extra. Properly detailed transitions at the shower, tub, walls, and plumbing penetrations help keep a future leak from turning into another subfloor repair.
For homeowners and property managers, the value of a full-service flooring team is clear: one qualified crew can handle removal, subfloor repair, surface preparation, and new flooring installation without gaps between trades. That reduces scheduling delays and gives the finished floor one accountable standard of quality.
Get a Stable Bathroom Floor That Lasts
An uneven bathroom floor is rarely just a cosmetic issue. It can be an early signal of hidden moisture, inadequate support, or failed past work. Address it before installing the finish floor, and the result will look better, feel solid, and hold up under daily use.
For Central Florida projects, Rox Floor provides professional floor removal, subfloor preparation, bathroom remodeling, and high-quality tile, vinyl, and marble installation. A clear evaluation of the existing floor is the fastest way to determine whether your bathroom needs targeted leveling, subfloor replacement, or a more complete repair before the new finish is installed.