
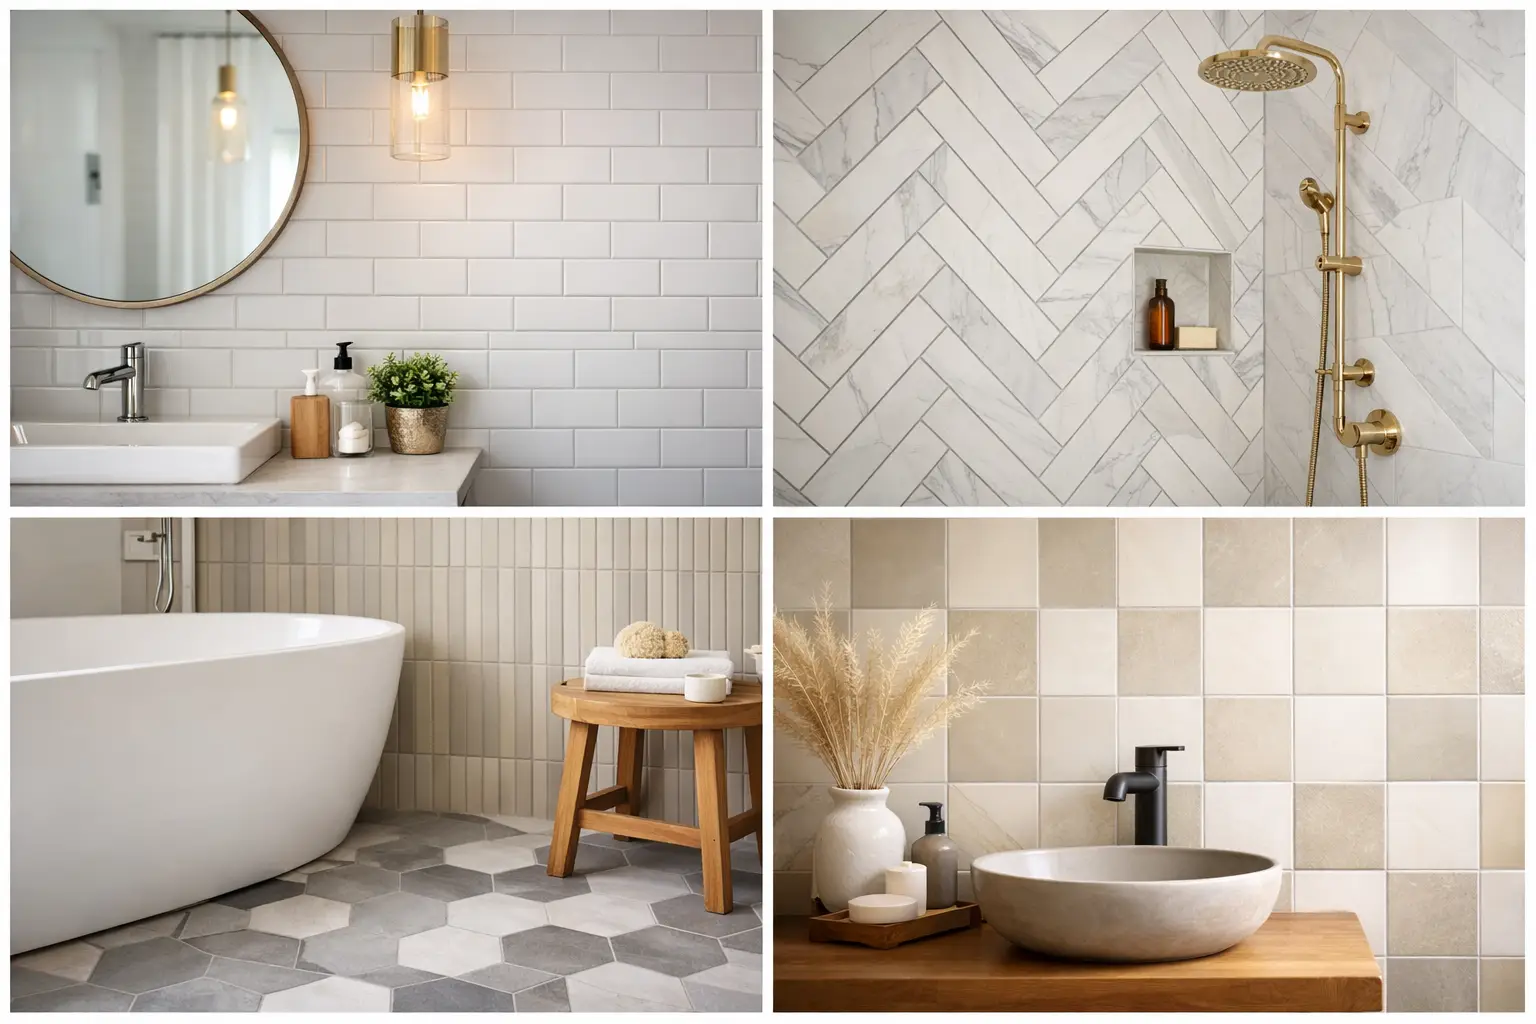
9 Best Bathroom Tile Layout Ideas
A bathroom can have great tile and still look off if the layout is wrong. That is why the best bathroom tile layout ideas are not just about picking a beautiful material. They are about scale, direction, grout lines, wall height, and how the room feels the moment you walk in.
For homeowners, property managers, and investors, layout choices affect more than style. They influence how large the room appears, how easy it is to clean, how premium the finish looks, and how much waste and labor the installation creates. A strong layout can make a standard tile look custom. A poor layout can make an expensive tile feel like a missed opportunity.
What makes the best bathroom tile layout ideas work
The best layouts do two jobs at once. They improve the visual proportions of the room and they respect the technical reality of the installation. That means accounting for drain placement, shower niches, corners, plumbing fixtures, and how cuts will land at the edges.
This is where experience matters. A layout that looks good on a sample board may not look balanced across a real bathroom floor or shower wall. Centering, tile size, grout spacing, and transitions all need to be planned before installation starts. In many remodels, the cleanest result comes from handling demolition, surface prep, and tile installation as one coordinated process instead of treating them like separate jobs.
1. Straight lay for a clean, reliable finish
A straight lay is the most classic option, with tiles installed in a simple grid. It works especially well when you want a bathroom to feel calm, bright, and organized. If your goal is a timeless result that appeals to future buyers or tenants, this is a strong choice.
It is also one of the safest layouts for showcasing premium materials like marble-look porcelain or large-format ceramic. The pattern does not compete with the tile itself. Instead, it lets the color, texture, and veining stand out.
The trade-off is that straight lay can feel plain if the tile selection is too basic or the room lacks contrast. In that case, the layout often benefits from a feature wall, contrasting grout, or a more refined tile size.
2. Brick pattern to add movement without overcomplicating the room
The brick pattern, also called running bond, staggers each row for a more relaxed and dynamic look. It is commonly used with subway tile on shower walls and bathroom backsplashes because it adds visual interest without making the room feel busy.
This layout works well in traditional, transitional, and even modern bathrooms depending on the tile color and grout choice. White subway tile in a brick pattern is still one of the most dependable combinations for a clean resale-friendly remodel.
There is one important caution. With larger rectangular tiles, a 50 percent offset can create lippage if the tile has any natural bow. Many professional installers prefer a one-third offset for better leveling and a cleaner finished surface.
3. Vertical stacked tile for height and a modern look
If your bathroom ceiling feels low, vertical stacked tile can help. By running rectangular tile straight up instead of horizontally, the walls appear taller and the shower feels more architectural.
This is one of the best bathroom tile layout ideas for smaller bathrooms that need a sharper, more current look. It feels intentional, upscale, and less expected than standard subway tile installation. It is also a smart way to make a simple tile feel more custom.
Because the lines are so clean, this layout leaves very little room for sloppy prep or uneven spacing. Wall flatness, precise cuts, and crisp alignment matter even more here. When done right, the result is premium. When rushed, the flaws show quickly.
4. Herringbone for a high-end focal point
Herringbone has strong visual impact. It brings energy, direction, and a custom feel to floors, shower walls, or recessed niches. If the rest of the bathroom design is fairly simple, herringbone can be the detail that upgrades the entire space.
This layout works especially well in powder rooms, shower accent walls, and vanity backsplashes where you want a focal point without overwhelming the whole room. It can also help elongate a space depending on the direction of the pattern.
The downside is cost. Herringbone usually requires more cuts, more layout planning, and more installation time than a basic grid. There is also more material waste. For clients balancing budget and impact, a targeted use of herringbone often delivers better value than applying it everywhere.
5. Large-format tile to reduce grout lines
Large-format tile is one of the most requested options in modern bathroom remodels, and for good reason. Fewer grout lines create a cleaner, more spacious look. That is especially useful in primary bathrooms and smaller guest baths where visual clutter can make the room feel tighter.
This layout strategy works well on both floors and walls, particularly with stone-look or concrete-look porcelain. It gives the bathroom a sleek, premium feel and can make maintenance easier since there is less grout to scrub.
Still, large tile is not automatically the right answer for every bathroom. Tight rooms with lots of corners, curves, or plumbing interruptions may require many cuts. If the substrate is not properly prepared, large tile can also highlight uneven surfaces. The layout only looks high-end when the prep work is equally high quality.
6. Diagonal layout to make small floors feel wider
Setting floor tile on a diagonal is a proven way to make a smaller bathroom feel more open. Because the eye follows the angled lines outward, the room often appears wider than it is.
This can be a very effective option in compact bathrooms, hall baths, and older homes with limited square footage. It adds visual movement and can make a basic square tile feel more interesting without needing a more expensive material.
At the same time, diagonal layouts can increase labor and waste because of the perimeter cuts. They are worth considering when the room needs help visually, but they may not be the most efficient option if budget and speed are the top priorities.
7. Floor-to-ceiling shower tile for a finished, premium result
One of the smartest layout decisions in bathroom remodeling is not just pattern-related. It is height-related. Running tile all the way to the ceiling in the shower creates a more complete and upscale finish than stopping at a lower line.
This approach makes the room feel taller and avoids the unfinished look that can happen when tile ends several inches below the ceiling. It also protects more wall area from moisture, which matters in busy bathrooms and rental properties.
For a polished result, the vertical layout should be coordinated with the niche, valve trim, and plumbing fixtures so everything feels centered. These are the details that separate a fast install from an expert one.
8. Mixed tile layouts to define zones
Not every bathroom needs one tile layout from wall to wall. In many remodels, the strongest design comes from using different layouts in different areas. A straightforward floor tile can pair with a vertical shower wall, while a herringbone niche adds a small but effective accent.
This strategy helps define zones without making the bathroom feel chaotic. It also lets you control where the visual impact goes. Instead of paying for a highly detailed layout everywhere, you can place it where it matters most.
The key is restraint. Too many patterns in one room can make the bathroom feel smaller and less refined. Usually, one main layout and one accent layout is enough.
9. Centered layouts that prioritize symmetry
Sometimes the best layout idea is not a specific pattern but the decision to center everything properly. Symmetry matters in bathrooms because the room is full of fixed reference points like vanities, drains, mirrors, and shower valves.
A centered layout can make a modest bathroom look custom-built. Balanced cuts at the edges, aligned grout joints, and thoughtful placement around niches and fixtures create the kind of finish people notice even if they cannot explain why it looks better.
This is where professional planning makes a measurable difference. A rushed layout often leaves awkward slivers at walls or badly aligned joints around focal areas. A well-planned one looks intentional from every angle.
How to choose the right bathroom tile layout
The right layout depends on the room size, tile shape, budget, and the result you want. If you are remodeling to sell or lease, simpler layouts with broad appeal usually make the most sense. If you are upgrading a long-term home, it may be worth investing in a more custom pattern where it will have the strongest visual payoff.
It also depends on the condition of the existing bathroom. Old flooring, damaged underlayment, uneven walls, or moisture issues can affect what layout will perform well. That is why the best results start before the first tile goes down. Demolition, surface preparation, waterproofing, and installation all have to work together.
For many projects in Central Florida, speed matters, but speed without planning usually costs more later. The better move is to choose a layout that fits the room, fits the budget, and can be installed to a high standard the first time.
A great bathroom does not happen because the tile was expensive. It happens because the layout was smart, the prep was right, and the installation was done with precision. If you want the room to feel cleaner, larger, and more valuable, start with the layout and make every line count.